Showing posts with label unhealthy but awesome. Show all posts

Thursday, February 23, 2012

French Silk Cheesecake 5/5 Spoons

Okay, so I love cheesecake and I love chocolate. So it is always only logical to throw the two things together and make something so decadent, delicious and INSANE that you will dream about it.

I am entering a cheesecake this summer into the Great Wisconsin Cheese Festival and have started to work on and think about what I could make so I can win! I mean as a first-time entrant, I doubt I will win, but it doesn't hurt to try! So one morning I was watching Cook's Country and they made French Silk Pie. Whoa. I haven't had a slice of French Silk Pie since going to Perkins in high school. I was sitting here and thought to myself, "What if I made a layered French Silk Cheesecake???" and thus a star was born. That one right below.


The French Silk Pie was no bake so I had to find a no-bake Cheesecake recipe that would mimic the smooth, mousse like texture of the chocolate and found this one. Although there were a few steps to making, waiting and assembling everything, overall every step was easy. You just need patience and when it comes to something as delicious as this, I had no problem waiting.

Here are my notes:

Cheesecake part -

-- Um, nothing. It's perfection, don't change it.

French Silk pie part -

-- I cut the recipe in half because I didn't want an extremely tall cheesecake and I think it worked out well. I cracked three eggs in measuring cup and only poured half into my bowl. Make scrambled eggs with the rest!
-- Make sure your bowl and beaters are very cold. Put them in the fridge for 10-15 minutes before beating your cream. Trust me, it helps a lot.
-- Use good chocolate. It will be worth it. I used a 4 ounce bar of Ghirardelli's 60% Bittersweet Chocolate. It's my (affordable) favorite. (Oh use baking chocolate instead of chips, chips have stabilizers and you don't want anything potentially ruining your silkiness.)
-- Wanna hear something dumb that totally ended up being absolutely okay? I forgot to add the butter. I could not even believe it. I took such time to get the butter at room temp and I forgot it! But to be honest with you, the French Silk mousse was AMAZING. So yeah, I recommend doing it my way because I just saved a lot of calories getting rid of those 4 T. of butter, ha.
-- So, I didn't bother to bring my egg mixture to 160 degrees. Yup, I was sick of hand mixing it over the stove and potentially electrocuting and setting myself on fire at the same time. I mixed it for about 7 minutes until it was light and fluffy and then mixed again for about 2-3 minutes off the heat. I am not worried about raw egg like perhaps I should be, but we only live once right?


The only negative I will say is that I think the chocolate overpowers the cheesecake part too much. They are delicious but I found myself eating the chocolate part and then the cheesecake part. That is not going to fly at the festival. So back to the drawing board. But if you want an insanely impressive dessert with not a ton of fuss but with a lot of fancy, I would recommend trying it my way.

PS - A springform pan is kind of the best thing in the world. And I found mine for $3 at a thrift store!

Up next, something healthy! I swear.

Friday, January 20, 2012

THE ICE(CREAM) (WO)MAN COMETH.

This past Christmas, I received a lot of amazing gifts from my beautiful parents (HI MOM!) like this, this and this (among many other awesome things as well). But I think the present I was most excited for was the Hamilton Beach 4-Quart Ice Cream Maker! I had never made homemade ice cream before and I was so stoked to get it and make this dream come true.

I will back track and say that ice cream has never been my favorite dessert. Sure, I love it but not as much as a cupcake piled high with cream cheese frosting or a warm, buttery chocolate chip cookie. But I live with serious ice cream lovers and it has really grown on me as well, so I wanted to make this dream a reality. So far, I have made three different kinds of ice cream. One was this lemon recipe from Epicurious, espresso from Ina Garten via Food Network and lastly (and the most exciting) was the vegan Coconut Milk ice cream adapted from this recipe. I will briefly review each one and just let you know what I think about the ice cream making process and obviously the best part: eating the ice cream.

First off, I will review the ice cream maker. Since I have no frame of reference, I would say this ice cream maker is pretty bad ass. It is easy to manuever, easy to clean up and is pretty self-explanatory when you open it up. The only thing I would say that is unpleasant about it is the noise. It is REALLY LOUD. For me, I didn't mind so much because I put it on a blanket in my room and shut the door and let it do its thing. But if you have neighbors who already hate you or a baby sleeping, I would not suggest using this machine. Now moving on to the good stuff!

Ice Cream #1: Lemon

So I will start with my least favorite. And I only say least favorite because the other two were SO GOOD that this just happens to be third. It is fantastic ice cream so don't let me putting it in third deter you from making it. I am a lemon fiend so this was fantastic for me. It was so tart but still totally sweet and did not leave you looking for that lemon flavor. The only thing I changed about the recipe is that I used 1 c. of heavy cream instead of all half & half per reviewer's notes. I would say just stick with the recipe like it is. I made the espresso ice cream with all half & half and the texture was pretty stellar. I definitely used 1 c. of sugar because I was afraid to stray in fear of my lemon ice cream being way too tart. So yeah, basically stick with the recipe, that's my words of wisdom.


(I don't have pics of the ice cream, so deal with this cartoon that for some reason made me giggle. Who knew lemons were so funny?)

#2 Ice Cream: Espresso

So, I have severe problems with Ina Garten but that woman makes a damn fine ice cream. Or at least her underlings do and she just shows us how to do it on TV. The only thing I changed here was not adding in the chocolate covered espresso beans, which I'm sure is fantastic but would have been overkill in my eyes. And like, I didn't want to spend the money on them (let's be totally honest here). This had such a wonderful coffee flavor without being "too much" of a good thing. It smells weird once you cook it and strain it and let it sit in the fridge. I'm not sure why it smelled weird but I went with it anyway and it ended up being my favorite ice cream of them all. This one went the fastest. And since I still have half & half in my fridge, I will probably be making this again. (Ooooh, and another gift I received via Amazon gift card was instant espresso powder by Ferrara, so good.)


(Another photo that is not mine from Sugar Crafter)

#3: Vegan Coconut Milk Ice Cream

So yeah, the vegan ice cream is an elusive she-goddess. I know there are tons of awesome vegan ice creams out there (So Delicious, Tofutti, etc.) but I just haven't been really keen on any of them. As someone who still eats dairy, I guess I was looking for something that mimics the real thing. I realize how ridiculous that is but this Coconut Milk Ice Cream was like a godsend to me. So to start, I used one low-fat and one full-fat can of coconut milk. It's what I had on hand and it worked great. I left the banana out because I wanted pure coconut flavor and instead of arrowroot powder, I used cornstarch. And I wanted a "tropical" element (because we need it in Chicago in January) to my ice cream so I added fresh pineapple. I put it in a strainer for about an hour to drain the juices and then patted it dry with a paper towel. Okay, so everything went swimmingly when I made the base but note to everyone if you make this: DO NOT ADD IN THE PINEAPPLE UNTIL AFTER THE ICE CREAM IS DONE CHURNING. I stupidly put it in the canister with the coconut milk base and it froze up (from the residual water in the pineapple) after about 25 minutes. It churned enough where I could just put it in a container and freeze it and was still wonderful but learn from my mistake. Put your add-ins at the end, not the beginning. Despite that mistake, albeit a delicious one, this ice cream was off the charts. It had that silky mouth feel you get from dairy desserts and a wonderful subtle coconut flavor. I think next time I might throw in some toasted coconut at the end as well. So much better than store bought!


(Photo courtesy of The Whinery 2.0)

Whew! That's a lot of words. Thank you reading this all if you got through it. I know this may not pertain to all but it is worth checking out a cheapo ice cream maker to make these recipes. If you have recipe suggestions, I'd love to hear them! Beyond the espresso recipe again, I'd love to try a strawberry cheesecake or peach melba. Yum. Enjoy! And keep warm!

Monday, October 17, 2011

Red Velvet Waffles w/ Cream Cheese Maple Sauce and Toasted Coconut 4/5 Spoons

OK, so it is not the weekend anymore, but here I am!

I have this insane idea to make pancakes/waffles out of all of my favorite desserts and luckily people around this beautiful world have the same idea as well. I've made Vegan Carrot Cake Pancakes and now Red Velvet Waffles (next will be Lemon Poppyseed Pancakes!) I served this with my standard tofu scramble (Thanks Kris Anne!) and some MorningStar Farms Veggie Bacon.


(My picture of my 2nd waffle.... I was too hungry to take a picture of the 1st one! That is the cream cheese maple sauce and toasted coconut on top.)

Here are my notes:

-- I was astounded that someone would use 1 1/4 cups of sugar in these waffles. These made 6 big waffles for me, so that's like a little less of 1/4 c. of sugar in EACH WAFFLE. Sick. I used 1/2 c. and I think it was plenty. I wanted the cocoa flavor to shine through and I was putting sweet syrup on top, so I recommend you don't go above 1/2 c. unless you love really sweet things.
-- Make sure to have your buttermilk at room temperature. Even though my butter was melted and cooled, my buttermilk was cold so it kind of turned the fat in the butter into a weird flaky mess. I could whisk most of it out but you don't want to over-whisk waffles so just a note for y'all.
-- For my cream cheese maple sauce, I didn't use their recipe. I left 4 ounces of cream cheese out at room temp most of the day. I warmed up the cheese in the microwave for about 40 seconds and added about 2 T. confectioner's sugar, 3-4 T. pure maple syrup and a dash of milk to combine. Just mix with a fork until it is smooth and you are able to drizzle it on your waffles.
-- As for the coconut, it was kind of an after thought. I put about 1/2 c. of coconut in a pan and toasted it on low-medium heat and stirred it frequently. It takes about 10 minutes, just keep an eye on it, because it can burn quickly.


(Photo courtesy of The Spellbound Cafe)

These were really delicious. I wouldn't say they were perfect because I think they could use some tweaks. Not sure what but I'll mull it over and let you all know. They had a great cake like texture but didn't necessarily crisp up the way I wanted them to in the waffle iron. It might have something to do with my really old iron and not with the recipe though. Even though they were a bit floppy they had a really nice cocoa flavor and worked SO WELL with the cream cheese maple topping and toasted coconut. I will make this again with some minor adjustments. If you have fantastic waffle and pancake recipes you think I should try, please let me know!

Next up.... Spinach and Artichoke Spaghetti Bake! (My own recipe.... ooh la la.)

Sunday, October 9, 2011

Mexican Hot Chocolate Snickerdoodles 5/5 Spoons

It is so rare when my end product actually looks almost exactly like the product in the recipe picture. I am so proud of myself here.

Isa's cookies:


My cookies (with a camera phone under the harsh light of my stove, so use your imagination...)


These Mexican Hot Chocolate Snickerdoodles are exactly what I wanted to eat tonight. I wanted something chocolate-y and I had everything I needed for these simple and easy cookies. The heat hits you about 30 seconds in to eating these cookies and linger but not in a bad way. It's a warming taste and really damn good.

Here are my notes:

-- I used vegetable oil because it is what I had.
-- Instead of a full cup of sugar, I only used 2/3 of a cup.
-- I have been using So Delicious unsweetened coconut milk lately instead of soy/almond milk and I love it, especially in baking.
Edit: I forgot to add this, about halfway through the baking, I took the cookies out and pushed them down with the bottom of a drinking glass. It flattens the cookies out so they aren't puffy but more flat and chewy in the middle.

For some reason, I'm always wary of using maple syrup in baking. I can't really taste it at all in the cookies so I'm assuming it gives it a depth of flavor along with the chocolate. No matter what, these were amazing. These will definitely be made again.

Up next, Red Velvet Waffles with a Coconut Cream Cheese topping!

Wednesday, June 15, 2011

Perfect Lemon Bars 5/5 Spoons

They really are perfect.

Perfect enough for me to be the only one eating this entire pan of lemon bars all by myself over the course of 4 days. I don't even care if no one else likes them, I LOVE THEM. I wanted something much more tart than the Buttermilk Lemon Bars I made previously (which are amazing in their own way). Baking Bites never fails to offer me a slew of lemon desserts. As I was eating these I kept imagining making them with oranges and limes and just salivating at the mere thought.


(Photos courtesy of Baking Bites, and they look way prettier than mine turned out!)

Although there aren't many, here are my notes:

-- I used 1/2 t. kosher salt instead of 1/4 t. table salt.
-- Once again, I didn't measure the zest, I just completely zested one whole lemon and added it in.
-- I used about 4 lemons and almost got a cup of juice. To supplement the little bit I was missing, I just added water. I wouldn't advise doing that if you have 1/4 c. or more missing. You can substitute orange juice if you have it, that would work awesomely.


My lemon bars weren't exactly "pretty" but whatever, they tasted amazing. I didn't bother putting confectioner's sugar on top because I wasn't serving them to anyone and I didn't want the added sugar. Speaking of sugar, I'm sure we all know by now that I'm notorious for downplaying sugar in desserts when I feel like it is just too much. Not this time. I am glad I put the whole 1 1/3 cups in because there is so much lemon juice to counterbalance it all. The nice thing about these bars is that you can have a small one (or three or four, not like I would do that) and be totally satisfied. So if you are a normal person who eats normal portions of desserts (nope, not me) then this will take you a long way. It was super easy to make and just tastes so phenomenal. The tartness of the lemons really plays nicely with the buttery shortbread crust underneath. They are a match made in heaven.

Up next, not sure! I haven't been cooking much since we have an out of town guest staying here but I will be back and ready to rock next week with all new recipes. Take care!

Tuesday, May 24, 2011

Chocolate Cupcakes with Raspberry Cream Cheese Filling and Vanilla Buttercream Frosting 4/5 Spoons

The title is quite a mouthful, huh? There is no way to shorten it without people asking, "So what is this stuff inside? What's on the top?" Long name usually means all kinds of goodness packed inside and this is no exception.


(You will have to deal with my crappy cell phone photos for this one!)

I found this recipe for Dark Chocolate Raspberry Cupcakes (although I wouldn't exactly call them "dark"). Initially I had planned on just dolloping raspberry preserves in the middle but I wanted to bump up the filling factor. If you are a baker, you know how much of a pain filling a cupcake can be. As long as I'm sawing off the tops and filling it with something, might as well make it extra special. None of the raspberry cream cheese fillings I found fit the bill, so I just made up my own! It was kind of beyond easy and don't really need to pat myself on the back for this (okay, I will... pat pat).


When it was all said and done, I barely deviated from the original recipe above. I made up my own version of a filling and cut the buttercream frosting recipe in half. Here are my notes:

-- All I could find at the grocery store was normal unsweetened cocoa powder, not dutch process. It worked out just fine.
-- I left my eggs at room temperature for about 3 hours and they were perfect. Here is an explanation why room temp eggs are better than cold in baking. You learn something new everyday.
-- Skim milk was used instead of anything else that is often used in baking. It was either that or almond milk. I honestly don't think any kind would make a big difference.
-- You may realize that something is missing in the recipe that is ESSENTIAL for chocolate desserts (heck, all desserts). SALT! I didn't see it and was confused so I added about 1 t. of kosher salt.
-- I halved the frosting recipe. I followed it all and really didn't like it (hence the 4 stars). It came out looking of glossy and like royal icing (which I wasn't looking for). I'll probably find something more suited for my tastes next time.
-- If you haven't filled anything before, here is what I did. Grab a cupcake, take your sharp and small knife and jab it in at a 45 degree angle. You want to make a small cone sort of shape with the cake top so that you can discard the bottom part and the filling won't overflow. Baking Bites can explain it better and with pictures here!

So I baked these up all pretty and made this raspberry cream cheese filling (this is from memory, so hopefully it's not totally off on the measurements):

4 ounces cream cheese, room temp
1/4 c. raspberry preserves (you can use any kind if you don't like the seeds)
1/2 t. vanilla
2 T. confectioners sugar

Whip the first three together until well combined. Add the sugar 1 T. at a time until it comes together. It doesn't need to be firm, but needs to hold together well.


(As you can see, these went over well.)

Overall these cupcakes were AWESOME. The cakes that were a little more full came out really fudge-y and were hard to cut into but tasted so good on their own. Almost like a cupcake brownie (don't even get me started...). I wouldn't necessarily say these were very "dark" but still had a nice chocolate flavor and not overly packed with sugar. I think the real shining star here is the raspberry cream cheese filling. It has a nice creamy, tart flavor with a punch of fruity goodness right at the end. So what I'm saying is, make this. It takes a bit of work and some patience (which I don't have) but they came out great.

Up next, White Pizza with a Chicago style deep dish crust!

Thursday, May 5, 2011

Asparagus, Leek and Swiss Quiche 5/5 Spoons

"How do I love thee? Let me count the ways.
I love thee to the depth and breadth and height
My soul can reach, when feeling out of sight
For the ends of Being and ideal Grace.
I love thee to the level of everyday's
Most quiet need, by sun and candle-light.
I love thee freely, as men strive for Right;
I love thee purely, as they turn from Praise.
I love thee with a passion put to use
In my old griefs, and with my childhood's faith.
I love thee with a love I seemed to lose
With my lost saints, --- I love thee with the breath,
Smiles, tears, of all my life! --- and, if God choose,
I shall but love thee better after death."

- Elizabeth Barrett Browning

Okay, sometimes I love to be dramatic when it comes to food and after eating this quiche, you would understand why.


(Photo courtesy of Martha Stewart)

Finding and making this recipe was kind of a "throw the ingredients on the list and we'll see if it happens" sort of thing. I always have one meal that is iffy like that. Ideally I just love to eat asparagus roasted but I wanted to make something a bit fancier. Instead of this being the last thing I would make (and probably waiting until the leeks were too soft to eat), I made it first! And it was so worth the little bit of effort that was put forth. Oh, and can I say? I LOVE MARTHA STEWART. I like any woman who is a bitch, gets shit done and makes amazing recipes like this.


Here are my notes:

-- First, the quiche crust. I used this pie crust recipe from Martha Stewart that was suggested on the website. This is my new go to pie crust. It was flaky, light and buttery. All the things that are needed in a quiche and any and all sweet and savory options.
-- Instead of 1 T. of butter, I just used olive oil. There is plenty of butter in the crust as it is.
-- I used skim milk instead of half-and-half. I think it made for a slightly more watery texture at the end but I don't particularly like the richness of half-and-half, so I always skim milk instead.
-- Instead of Gruyere (which is delicious), I used Swiss instead which is a. cheaper, b. more widely available in supermarkets and c. is similar to Gruyere. I think you could honestly use any kind of cheese here.

Even after downing a super sweet Pina Colada and a pile of homemade guacamole, I still had room for two slices of this quiche. It was like sunshine shaking hands with a rainbow inside of my mouth. In other words, the crust was buttery and flaky, the inside was cheesy and rich (but not too much), so it was a wonderful balance of flavors. I know I say this about almost all of the recipes I show you, but this is one I would recommend making ASAP. And since asparagus is in season now, I would suggest making it even sooner than ASAP. Whatever that is. : )

Saturday, April 2, 2011

Full Breakfast! 3 Items Reviewed!

Wow, totally missing in action ONCE AGAIN. I find it hard to focus sometimes even when it comes to food which I realize sounds insane. I have been cooking and baking a lot but I've been trying to keep myself busy. When you are looking for work, it is important to keep busy otherwise you will go totally batty. So anyhow, this is one of the best recipes from the last 2 weeks or so.


(Photo courtesy of Post Punk Kitchen)

So, of course I love sweet things for dinner as much as I like them any other time of the day. I try not to make this a habit but sometimes a girl needs a buttery, crispy waffle oozing with warm maple syrup to finish off her day. Usually I go the waffle route because I like any reason to use my grandma's old iron. My friend Ethan pointed me in the direction of these sinfully decadent Vegan Carrot Cake Pancakes. These were made non-vegan with the addition of a Maple Cream Cheese Sauce but I thought it was necessary to go full tilt with the whole carrot cake idea. And to make this a full breakfast, I made my own vegan version of this Sausage and Potato Hash.

My notes and substitutions:

Pancakes

-- Instead of maple syrup as the sweetener, I just used granulated sugar.
-- Allspice isn't something I typically use, so I just added a dash more cinnamon to the mix.

Maple Cream Cheese Sauce

-- All I can say is make sure the cream cheese is FULLY at room temperature. I'm usually super anal about that but I let it slide this time and the sauce was lumpy. It was still good but would be more presentable for guests at room temp.

Sausage and Potato Hash


(Photo courtesy of Never Enough Thyme)

-- Instead of meat (of course), I used Lightlife Gimme Lean Sausage. This is my favorite sausage substitute and use it for meatballs, hash and put it on my pizza among other things.
-- I cut this recipe in half since it was only for two people but I could have easily demolished this all! It was so good and easy customizable.
-- If you are like me and love a good dark crust on your potatoes, crank up the heat. Once the heat is cranked, place a dish on top of the hash and weigh it down with a full tea kettle or a couple of cans to really get a crispy crust. Make sure to stir a few times and replace the weights again until it is to your desired crispiness. I believe this is essential to this meal, but if you are into limp potatoes, more power to you my loves.

Breakfast for dinner is like a pile of a thousand puppies playing. Basically what I'm trying to say it's awesome. Once I made the pancakes, I put them on a pan in a very low but warm oven (200 F) to maintain their heat but not continue to cook. And because it just makes me happy, I decided to toast some almonds to sprinkle on top. The pancakes had a really nice carrot cake flavor without being too sweet (unless you add the sauce, which just made them AMAZING). The salty crispiness of the hash and sweet warmth of the pancakes and sauce made this a perfect balanced meal. Well maybe not healthily balanced but certainly made my soul sing.

I give all the recipes:

5/5 Spoons!

I might not review another recipe for a little while again, but trust me I have notes and will be back. Take care all!

Sunday, March 13, 2011

Enchilada Bake 5/5 Spoons

Hey everyone! So it's been almost two weeks since I've written here and I have missed it so. We are moved into our new place and unpacked and everything is pretty wonderful where we are. I love being near restaurants, the train and like a block away from a post office. So to make my transition back into the blog, I will review a regular recipe that comes up my menu repertoire. A wonderful recipe that my whole apartment loves. I am talking Enchilada Bake......

So I was browsing through Mercy for Animal's Vegetarian Starter Kit (and that is the link to order one) at The Chicago Diner one day and found this recipe and it popped me right in the face. I love Mexican food and all the components seem to work so well together (diced green chiles, pinto beans, etc.), so I made sure to try it. YUM. So good. The wonderful combination of melty cheese, beans, green chilies and enchilada sauce just blows me away every time I have it. It is ridiculously easy to make and gives you plenty of food for leftovers. And who doesn't love food with Fritos crumbled on top? Seriously.


(This is a weird sad bastard picture of someone's enchilada casserole... sorry. I'll take my own picture next time!

Here are my notes:

-- I use flour tortillas instead of corn. I love corn tortillas but I know a lot of people don't like the texture of them (my roommates included).
-- Sometimes I make my own enchilada sauce (recipe here) but mostly I just buy the canned stuff, I ain't picky.
-- This is a vegan recipe but I use regular cheddar cheese but I imagine the Daiya Cheddar would work some serious magic here.
-- I always forget, but I mean to buy two cans of diced green chilies every time I make this. It can definitely use two cans, especially if you love the flavor and not necessarily the spiciness of chilies.
-- And when this is about done, I usually broil the top on high for about 2 minutes because I really like a crunchy crust on top.

I give this recipe:

5/5 Spoons!

I'm going to be making more new food this week and it will be amazing. See you again soon!

Thursday, February 24, 2011

Pumpkin Brownies 4/5 Spoons

I took about a bunch of Excedrin (ok, 3) and now I'm back with the fury of one thousand suns! I cooked and baked and chopped veggies this morning, went for a walk, talked to my temp contact through Northwestern, watched an episode of Big Love and woke up at a decent time today. I'm proud of me even though my body aches and I have cramps up the wazoo. Ok, enough about my lady drama.......

So I know for sure I'm not the only one who flips when there is talk of a canned pumpkin shortage. I even bought a fancy can of organic pumpkin this past summer because I crave pumpkin all year long. I was overzealous and went bonkers this past fall and bought like 10 cans of the stuff. Now that we are moving and want to try to eat all the food we have so there is less to take with, I've been looking for pumpkin recipes. This is the second time I've made these Pumpkin Brownies.


(Photos courtesy of Eating Is Art)

Here are my notes:

-- As usual, I used half of the sugar called for and I loved it even better this time around.
-- I don't use the entire bag of chocolate chips... that is just too much for me. Yes, I love chocolate but with the chips I use (Ghiradelli 60% Cacao Bittersweet Chips) I think it would become overwhelming.


This is a perfect combo of tender cake and dark chocolate gooey-ness that I crave on almost a daily basis. I think the warm spiciness of the ginger, cinnamon and nutmeg always go well with the dark, richness of bittersweet chocolate.

I give this recipe:

4/5 Spoons!

I'm on a roll, more from me later!

Sesame Tofu 5/5 Spoons

Sorry to be missing in action again, my loves. I am moving to a new apartment next week with an even better kitchen! I'm so damn sick of this apartment and it's oddly placed kitchen and small counter space that I have not been cooking much lately. Add on PMS and I'd rather burn the kitchen down than cook in it. But that doesn't mean I don't have a back up of recipes that I've made to review.... So here we go!

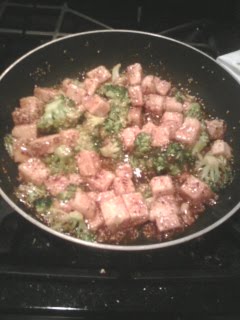
I'm glad to have foodie friends who are like, "Jackie, what the hell? Where are the recipe reviews?" so here I am talking about probably my new favorite vegan recipe this year. I mean it's so ridiculously easy and silly that I feel bad that it took me this long to actually perfect it. Sesame tofu guys! And I'm talking "Whoa this tastes like it is from Chinese take out" style sesame tofu. It may not be the healthiest thing in the world but there are far worse foods to spend your dinner hour with.


(photo courtesy of LA2DAY.COM)

So the way I make this is kind of a pieced together bastardized version of several recipes. The only "real" recipe I use is here for the Chinese Style Sesame Sauce (and even that I totally tweak the amounts). I looked at this one as well to get a feel for what I should do with the tofu. But I didn't like that she used egg in the tofu prep because I wanted to make this totally vegan. So all I do (and this is my favorite way to fry tofu) is take two blocks of tofu, slice them in bite size chunks, get a Ziploc bag and fill it with about 1/4 c. cornstarch and shake the hell out of it. You obviously don't want your tofu chunks too small or they will just be obliterated in the tossing process but I think you get the point. And I also freeze my tofu and let it thaw before using in this application. I've heard it gives tofu a chewier texture and by Xena, I think the experts are right.


(My own terrible picture!)

Ok, so here we go with the actual cooking. I take a fry pan and fill it with about 1 inch of vegetable oil. I hate using that much oil too but you won't get the great crunchy outside unless you really fry these babies up. Make sure to not crowd the pan otherwise you will just have soggy oily tofu instead of crisp deliciousness. So yeah, this part takes awhile. So be patient. While you are frying, take a small pan and add about 1/4 c. of sesame seeds to toast. Make sure you toss them about as to not burn them (like I did). Once they are done you can set them aside to add later on. When you are about half done with the tofu, you can start making the sauce. I don't know if I need to tell you this but make sure to drain your tofu on paper towel as well.

Here are my tweaks to the recipe above:

-- I only used 1/2 c. sugar and honestly, you could probably cut it down to 1/3 c. and there wouldn't be much of a difference. I find that so many recipes overdo the sugar amounts and I'm glad I didn't put a whole cup in here, it would have been too crazy sweet then.
-- Obviously I used vegetable broth instead of chicken broth.
-- I don't really ever have white vinegar around so I used apple cider and it worked just dandy.
-- Instead of soy sauce, I used tamari because it was what I had.
-- And okay, so I hate kind of hate sesame oil. It has a weird acrid taste that I can't stand whenever I make Indian or Thai food. Because of that I only added about two dashes of the stuff. I liked that there was a hint but not too overwhelming of a flavor.
-- I used hot sauce instead of chili paste since I didn't have any. I added pepper flakes as well because I wanted it spicy!
-- And I didn't use garlic.... I actually just forgot but I honestly don't think it would have added all that much anyhow.


(Photo courtesy of Green Shakes and Giggles)

So whew! A lot of instruction and a lot of changes! So let's piece this bad boy all together. Once the tofu is done, I like to empty out almost all of the oil except for maybe like 3 tablespoons worth. I threw some broccoli in there but you can add whatever you please.... carrots, onions, pineapple, etc. Once those were softened a tad I threw the tofu back in and tossed it with the sauce and sesame seeds and I had a wicked delicious meal. Serve with rice, I like jasmine but any rice will do.

Let me just add that this seriously tastes like take out sesame tofu. It takes a little more time and effort but it is so worth it to know what is going into your food and make it your own.

I give this recipe:

5/5 Spoons!

Wow, this was fun to do! I'll be working on more this week. Enjoy!

Thursday, February 3, 2011

Deadly Chocolate Almond Toffee 5/5 Spoons

So, I'm not much of a candy maker. I have made truffles before but those are super easy to do. And much to my surprise, so is toffee! I don't even have a candy thermometer and I have successfully made toffee and caramel. I know I should have one eventually but I think if you have a keen cooking eye and sense of smell, you will be totally alright. This is why I plan on making this recipe again very soon.


(My own picture on my brand new and wonderful Silpat! They are pricey but so worth it to make candy, cookies, pavlovas, etc.)

So my true intention for this toffee was to be a present for my lovely and beautiful friend, Samantha. She lives in Connecticut so I had to think of something I could send that a. wouldn't spoil and b. wouldn't break into a million pieces (and if it did, who cares! It's toffee!) And yeah, this made quite a bit more than what I was planning on sending her. Oops! I seriously ate this all in one day with only minimal help from my roommates. So this is pretty dangerous stuff.


(Photo courtesy of La Fuji Mama)

The only thing I changed is that I used finely chopped almonds on top instead of walnuts. I dare say this might be my favorite thing I've made this year (yeah, it is only February, but this is still saying a lot!) The texture of the toffee was out of this world. It was crisp but almost flaked into your mouth while chewing it. It was buttery with a dark caramel-y flavor. And I think I would rather not have the chocolate chips and almonds on top for next time. I would almost rather just have toffee and almonds as to not take away from the phenomenal burnt sugar flavor. I plan on making this again and good thing I'm obsessive about my oral hygiene because otherwise I might lose all my teeth. : P

I give this recipe:

5/5 Spoons!

OK, I will post an entree/side dish next. To appease the masses!

Sunday, January 30, 2011

Carrot Cake with Cream Cheese Frosting 5/5 Spoons

So, I feel like I should have an intense love affair with Carrot Cake. In some ways I do. I love carrots, love cream cheese frosting and love cinnamon based cakes all over the place. BUT this is never my go to dessert. And why not? I don't know you guys. This dessert was so sweet, soft, moist and creamy that I wonder why I don't choose carrot cake over chocolate when I'm out looking for a dessert. Chocolate cake is my dark mistress but I like to think of carrot cake as my booty call. We don't see each other a lot, but when we do, fireworks happen.

Enough of my sexual love towards desserts..... My roommate Steph loves carrot cake. It is her favorite dessert (or at least favorite kind of cake). One night we had just had dinner and I was desperately looking for something to make for dessert. I have this rule for myself. I don't buy myself sweets at the store, if I want dessert I have to make it myself. And trust me, I do. If we don't have a dessert ready to eat, I feel like I must make something. Hence, the carrot cake. When I said that I would be more than willing to make something but didn't have all the ingredients for a carrot cake.... Steph ran to the grocery store and got me some powdered sugar, carrots and cream cheese. I was off!


(This picture courtesy of me! I finally figured out how to get my shitty pictures off my phone onto the laptop. Expect more from me again.)

Once again, I don't think I did anything major in changing this recipe. It didn't need it. Definitely toast the pecans (or whatever nuts you choose). It gave the cake a nice toasty flavor you just won't get with plain old raw nuts. I cheated and used already shredded carrots. If that is a big deal to you, then maybe this is isn't the blog for you. (I'm kidding! I just really wanted to eat it as fast as possible!) And as for the frosting, I skipped the lemon zest. Not sure why, I just didn't feel like it needed it. Oh and those marzipan carrots? Please honey, I did not make those. I'm all about presentation but come on now. The way it tastes is much more important to me.


(Photo courtesy of Joy of Baking)

This was a very tender cake. Not too moist though which is important. The carrots and pecans were crunchy and worked well with the cinnamon spiciness of the cake. And seriously, who doesn't love cream cheese frosting? I don't care what anyone says but if you put butter + cream cheese together you get magic. So I think the frosting here is necessary for the tangy creaminess that it imparts floating on top of the cake.

I give this recipe:

5/5 Spoons!

Okay okay okay, I'll post an entree next. I wouldn't want anyone to think this is JUST a baking blog after all.

Saturday, January 8, 2011

Vegan (Almost) Chocolate Chip Cookies 5/5 Spoons

Let me preface this by saying, who doesn't love a really good chocolate chip cookie? I feel like you are some sort of evil Reagan-humping Tea Party lovin' Republican if you don't like buttery dough with chocolate mixed in.

So this recipe is totally vegan but I only had white chocolate chips to use, so that's why the (almost) is up there. Obviously, do as you want. I almost added coconut as well, but eh, I wanted something really basic.


(Photo courtesy of The Post Punk Kitchen)

My cookies did not end up looking anything like these BUT I made a lot of tweaks (based on what I had in my apartment) and they are still crazy delicious. Here are my notes:

-- So I had no brown sugar. I pondered what to do. Aha! Molasses + white granulated sugar = brown sugar. Duh. I found the right combo of the two on this website and made my own. There is another reason to keep molasses in the cabinet. So for this recipe it called for 1/2 c. brown sugar. I took 1/2 c. regular sugar and added 1 T. of molasses. Simple as that. Make sure to blend it together well. I just used a fork and mashed the hell out of it until everything was well incorporated.
-- I used plain soy milk instead of almond milk, no big whoop either way.
-- As for the tapioca flour, I just don't really ever have it around. Instead of that, I used 1/2 T. cornstarch. I found the substitution guide for thickeners here.
-- When I mixed everything together, the batter seemed a bit thin so I added about 1/8 c. more of all-purpose flour. Either way, the cookies that came out of the oven were very flat.

She is not kidding when she says that you need to mix the sugar, oil and milk combo very well. You need to whip the hell out of it but it makes a delicious caramel-y concoction that works so well in this cookie. I am not sure I would even call this is a "standard chocolate chip cookie" but it still came out phenomenal. I'm not sure what I could have done differently to make them more poofy but I didn't care. These are chewy and have a deep caramel flavor without even a hint of butter! I was wary of a oil-based cookie but now I am sold. It is nice to know that if I need to make vegan cookies that everyone will enjoy that I have this recipe (and all the ingredients) handy!

I give this recipe:

5/5 Spoons!

I'll probably post my favorite homemade pizza recipe tomorrow.... we shall see. Have a good night all!

Thursday, January 6, 2011

Vegetarian Midwest Taco Tater Tot Casserole 5/5 Spoons

This recipe title is a mouthful!

So this is pretty straightforward, I wanted to make something super super Midwestern and came up with this ridiculously easy recipe. This is not something I would make every night (or heck, even once a month) because I like to incorporate, ya know, vegetables into all my meals. But, it is something to make when you don't even feel like thinking while cooking and want something simple and delicious.


(Photo courtesy of Cooking for Kids Blog)

My recipe includes:

1 medium white/yellow onion, diced
2-3 garlic cloves, diced
2 packages of Morningstar Farms Veggie Crumbles
2 packages low-sodium taco seasoning
1 package Ore-Ida Tater Tots (or whatever you like)
Cheddar cheese, or whatever you like

Preheat oven to 400 degrees and grease a 11x7 casserole pan.

Dice and cook the garlic and onion over medium heat until just brown around the edges (or that's the way I like it, do as you please.) Add the crumbles with just a glug of water to get them going. Once they have absorbed the water and are fully incorporated, add the seasoning. Just mix and let cook over med-low heat until everything is well cooked and looks yummy. Pour the taco mixture into the pan and top with as many or as few tater tots as you like. I just do one solid layer because piling them on might mean that some tater tots overcook while others don't cook at all. Now just pile on as much cheese as you would like, this is all catered to your own taste if you haven't figured it out already. Bake for about 25 minutes or until the tater tots look nice and crisp on top. I served it with sour cream just because I like any excuse to put it on my food.

That's it! So flippin' easy it's almost silly to put on here.

I give this recipe:

5/5 Spoons!

Next up, Baked Mac & Cheese!

Tuesday, December 14, 2010

Yellow Butter Cake with Chocolate Frosting

I didn't make this yet but I really want to. It reminds me of the excitement of childhood birthday parties and that's a feeling we could all use in our lives.


(photo courtesy of Joyofbaking.com)

Monday, December 13, 2010

Buttermilk Lemon Bars 5/5 Spoons

I LOVE LEMONS.

LOVE LOVE LOVE. I can never get enough. It hasn't gone far enough where I would just eat a straight up lemon (unless it had sugar on it and came with a shot of vodka) but I won't rule it out in my lifetime.

Making these Buttermilk Lemon Bars seemed like an obvious choice and since I had 2 leftover lemons and some buttermilk in the kitchen, the fates were calling me.


Before I get into the recipe, I want to say how much I love the Baking Bites website. I would say I'm much more of a baker than a cook (although I love to do both) and this website is just chock full of recipes I've kept in my bookmarks to try. Like Salted Dark Chocolate Chunk Cookies, Chocolate Mint Cookie Squares and Samoas Bars. She has a cookbook too that I am interested in buying in the future. But enough of that now....

I didn't change a thing with this recipe. I followed it exactly because it didn't seem like it needed any tweaking at all. The only thing I would say is that they took longer than 20 minutes to fully cook through. Once they were done I put them in the fridge to cool overnight. I pulled them out this morning, dusted them with powdered sugar and cut it into 16 squares. They are tremendous. They are tart and sweet and the base is crumbly, buttery but cohesive.

So yeah, go make these. But only make them if you plan on sharing because I've had 3 already today and I plan on having 3 more and I even have two roommates!

I give this recipe:

5/5 spoons!

I don't have anything planned coming up, but trust me, I'll think of something and be back in the next few days. Love ya all!

Sunday, December 12, 2010

Kentucky Biscuits Recipe 5/5 Spoons

So once again, I decided to make these at like midnight last night. I always have a hankering to bake in the middle of the night. I will say that when I wake up in the morning with fresh biscuits it really starts your day off right.


(photo courtesy of TheLitterbox101 at allrecipes.com)

I honestly don't have much to say about these biscuits besides praising them highly. The only thing I changed is putting 1/2 t. of kosher salt instead of a dash. At first I thought they weren't salty enough (I used unsalted butter) but this morning when they were at room temp, I thought they had the best flavor. So if you can stand letting them come to room temp, you won't be sorry. The biscuit is super easy to make (about 30 minutes total mixing and baking) and it is so tender on the inside and crispy on the outside.

You could easily make these vegan by using about 1/2 - 1 t. of vinegar or lemon juice and filling it up to 3/4 c. with soymilk and Earth Balance for a butter substitute. I haven't tried it because it is hard to find Earth Balance sticks here unless it is at Whole Foods. If any one of my vegan friends/readers make these, please let me know. I would be curious to know how they turn out.

I give this recipe:

5/5 Spoons!

You will hear from me soon with the Buttermilk Lemon Bars I mentioned in the previous post. Obviously at this point I'm trying to use up the rest of the buttermilk in my fridge, haha. I hope they are worth the wait!

Wednesday, December 8, 2010

Pumpkin Chocolate Chip Loaf 5/5 Spoons


(Photo courtesy of Panda Cookies on allrecipes.com)

So is anyone else like a psycho for pumpkin once the cold weather rolls around? God knows I'm not the only one. Obviously sweetly savory type treats like pumpkin pie and ginger molasses cookies are a huge deal around Thanksgiving and Christmas. I mostly made this because I have a bad habit of picking up a bag of Ghiradelli dark chocolate chips ANYTIME I am at the grocery store. And like Lindsay Funke and an open bottle of vodka, I feel like if I open a bag of chocolate chips I must eat them RIGHT NOW ; like they will go bad or something. (We all know that is a lie I love to tell myself.)

Now onto the recipe.... I wanted to make these vegan (because I think it would be really easy) but I had two eggs to use up, so I figured I would make it as described. I put a lot more chocolate chips in that said, used mostly brown sugar instead of white sugar and I made it into a loaf instead of muffins and I thought it came out wonderful. It is tender without a lot of fat (only 1/4 c. oil) and a light pumpkin flavor. I thought the spices were just right and this would be ideal warmed with a dab of Earth Balance spread on top.

I give this recipe:

5/5 spoons!

Black pepper tofu tomorrow kiddos. IT'S SO GOOD. I bet you just can't wait.